
Create your account
Two screens, then one email to confirm. This is the only step where Aster asks anything about you, and it takes a minute.
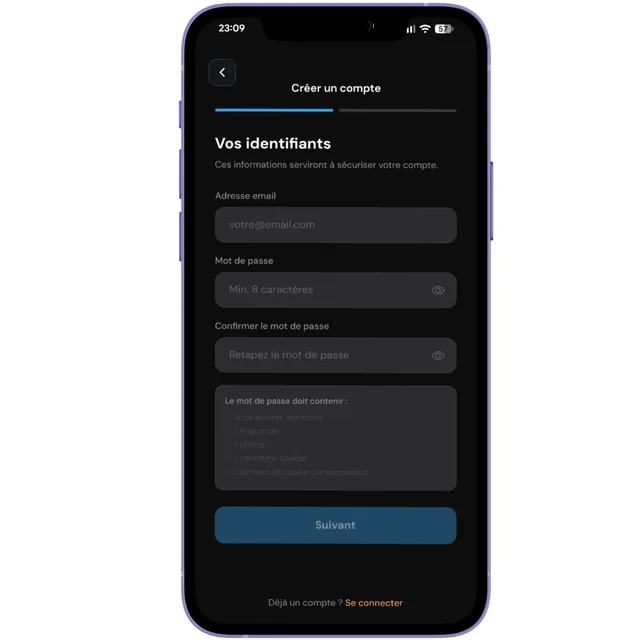
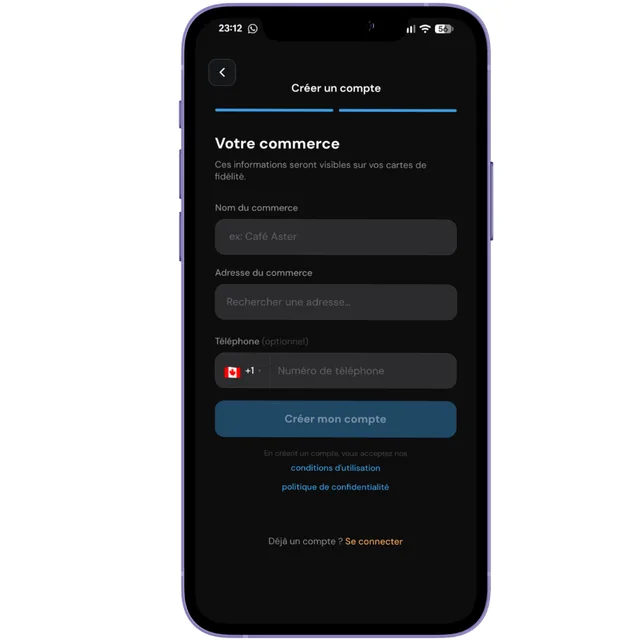
Enter your business details
Your business name is what customers will see on their card. Write it exactly as it appears on your storefront, not an internal abbreviation: this is the name that will reassure the customer at sign-up.
Choose your credentials
Your email address is used to sign in and to receive important messages from Aster. Pick an address you actually read, not a generic one nobody checks.
The password protects access to your customer list. Choose one you use nowhere else.
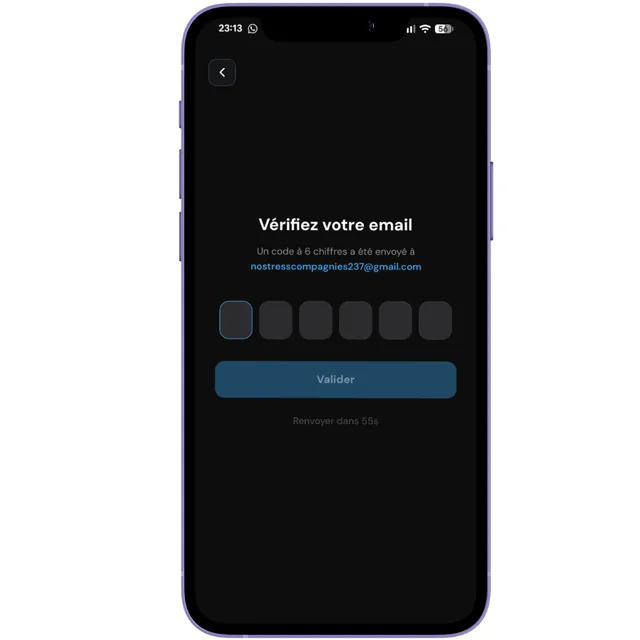
Verify your email address
Aster sends you a confirmation email. This step is not decorative: until your address is verified, you cannot create anything, no program, no card, no promotion.
If the email does not arrive, check your spam folder first. You can then request a new one from the app.
What can go wrong
You created the account but have not clicked the link yet. Open the email, follow the link, then come back to the app. If you cannot find the message, request a new one from your profile.
An account already exists with this address. Use sign-in rather than sign-up, or go through "forgot password" if you no longer remember it.
Check your spam folder, then the spelling of the address you entered. One missing letter is enough. You can correct your address from your profile, and a new email will be sent automatically.